It is #NationalMapReadingWeek!
So, we have asked Ordnance Survey to put together a quick and simple guide on how to read a map and use a compass.
Throughout the blog you will find great advice on this very important skill plus a section on the most common mistakes (don’t forget to share this article with that friend who is always getting lost).
Being able to read a map is an essential life skill if you plan on spending time in the hills. Although phones have GPS and countless navigation apps, it is important not to rely on them as your sole source of navigation. Phone batteries can run out, or you may be stuck somewhere remote with no phone signal – in these scenarios being able to read a map would be more than useful. Here’s a simple guide to getting started…
How to read a map
Map symbols and map legends
Most maps use symbols, rather than descriptions, to show where things are. This is to avoid the map being crowded with writing, making it harder to read. Most maps have a legend for you to refer to, so you know what you are looking at.
The legend will explain which symbols, colours and shapes represent roads, footpaths, woods, buildings, rivers, streams, and much more.
A word about scales
Maps are shown in different scales (for example 1:25k or 1:50k). The larger the map scale, the more detail that will be shown on the page, and the smaller the scale, the less detail will be shown. You would need to pick a map of a scale that is appropriate for what you need.
Reading Grid references, National grid lines, and latitude and longitude
National grid lines
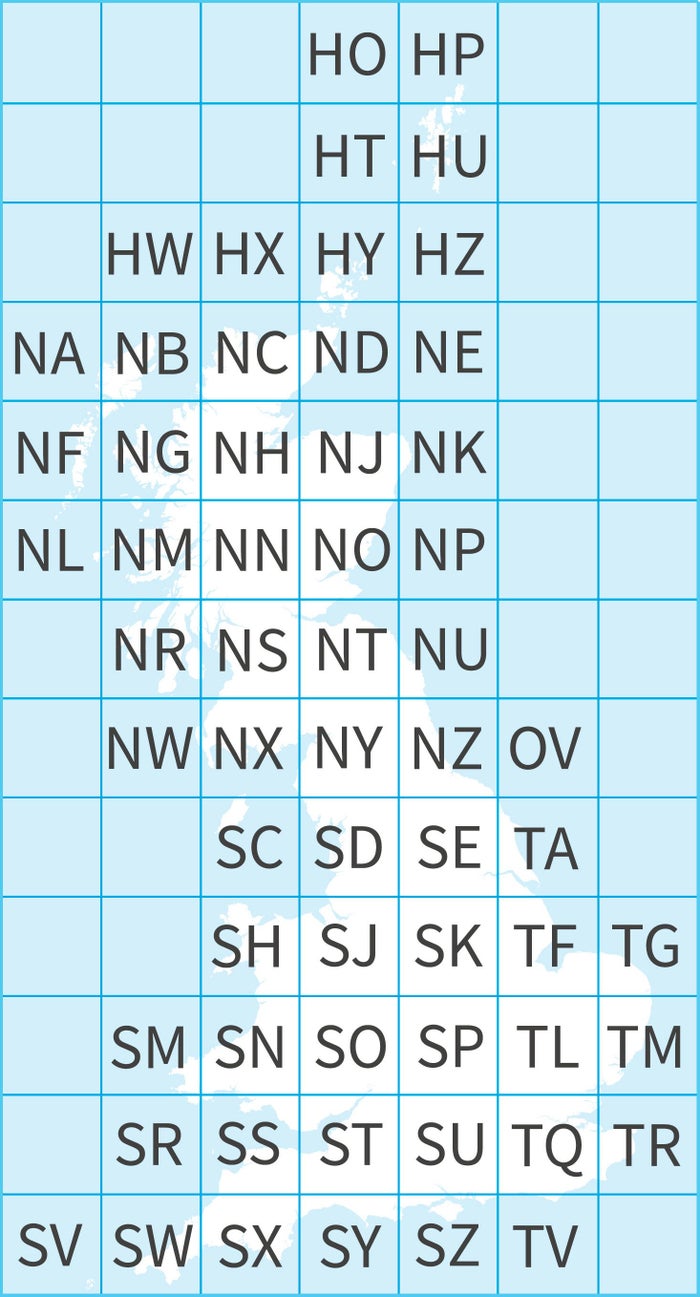
OS maps all have two letter prefixes, which divide GB into 100km squares and each square is given two letters. When you quote your grid ref number, be sure to include the two-letter prefix, so that the grid ref corresponds to the correct square.
Grid references
OS maps are covered in faint blue lines which make up a grid. Each grid square has associated numbers, and these numbers are what you use to pinpoint your location on a map. This is useful for being able to simply give others your location (e.g. mountain rescue).
Grid references, being read left to right on a map, are called eastings, and grid references going bottom to top, are called Northings.
Four figure grid references identify a single km square on an OS map, and six figure grid references identify a smaller 100m square, and eight figure grid references identify a 10m square for when you need accuracy.
Working out a grid reference
To work out a 4-figure grid reference, always give the eastings number first and northing second. Lay the reference out as per the example shown.

(EG SN 24 63 = 4SN 243 637 = 6SN 2435 6374 = 8 )
Once you have worked out the 4-figure reference, imagine the square is further divided into ten. Then count along how far along the eastings the square is, then how far up the Northings is. Write these numbers next to the digits for the 4 figure grid reference, to create a 6 figure grid reference, and so on to create an 8 figure reference.
Latitude and Longitude
Latitude and Longitude are global addresses, written in numbers, so that everyone can use them regardless of where they are. They are given as coordinates, made from horizontal lines, with the equator referring to 0 latitude, and vertical lines, with the line passing through the prime meridian referring to 0 longitude.
E.g. (50.937880, -1.470625) is the lat/long coordinates of Ordnance Survey.
Contour lines
Contour lines are orange or brown squiggly lines, with numbers next to them. The lines represent the contours of the land, and the numbers tell you the height each line is above sea level. The closer together the contour lines are, the steeper the slope.
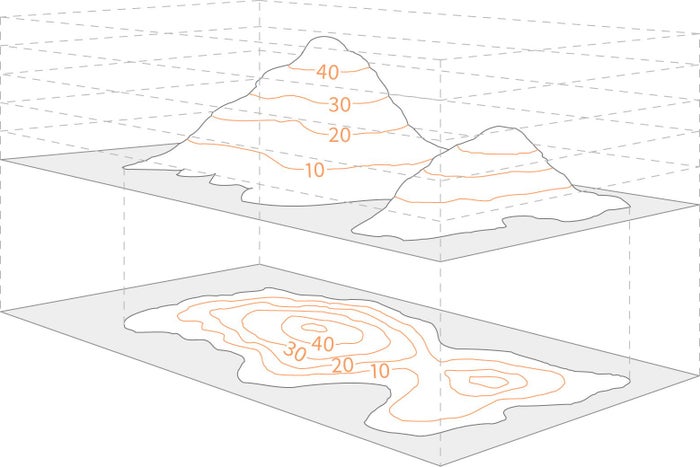
These lines are useful, as if you are planning a route, you can get a good picture of how steep it will be so that you are prepared. On most maps, the interval between contours is usually 5 metres, but in mountainous regions it may be 10 metres.
Top tip: practice comparing a map to the real world or a photograph, to get a good indication of how contour lines represent the real world.
Compasses and navigation
Most people use baseplate or orienteering compasses, which are good for accurate navigation with a map.
Step by step
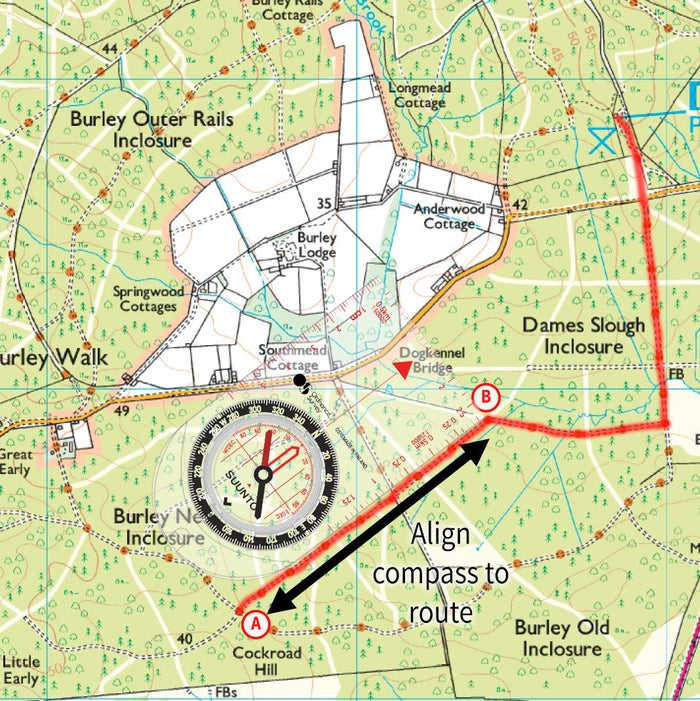
1. Line up the direction of travel arrow so that it is pointing from where you are starting to where you want to go.
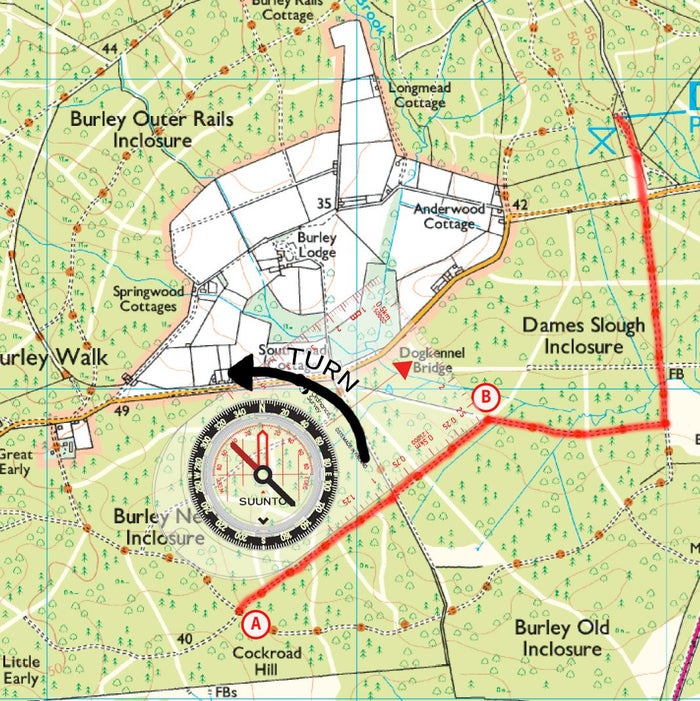
2. Now rotate the compass housing so that the orienting arrow lines up with grid north, and the horizontal lines inside the compass line up with the horizontal grid lines, or are parallel with the blue grid lines if they are not near to one.
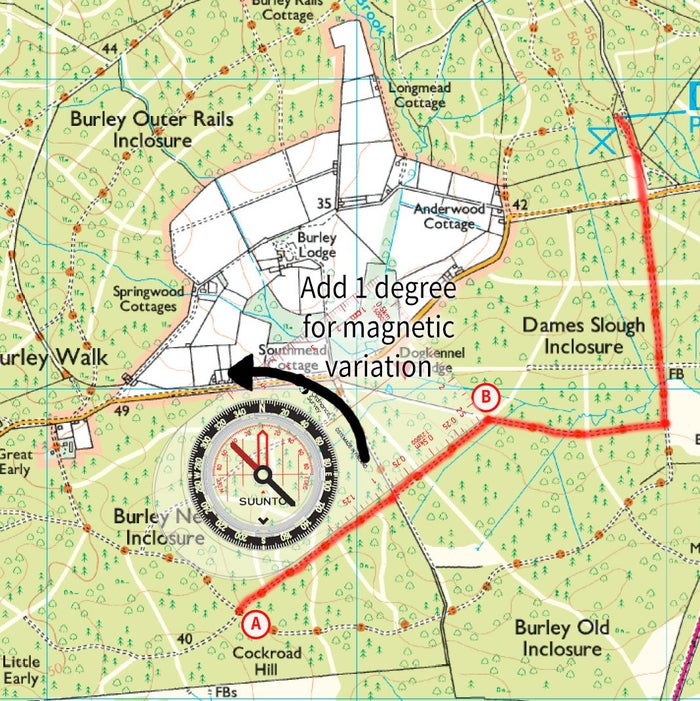
3. You need to adjust your compass for magnetic variation. Magnetic north varies throughout Great Britain, and can range from 0 to 5 degrees – your OS map will tell you the most current value of variation on the map legend. Be sure to add on this magnetic variation by rotating the compass housing.
4. Now you can take your compass off the map. Hold the compass flat at waist height, and turn yourself and the compass slowly until the red needle lines up with the letter N above the orienteering red arrow. Once you have done this, the direction of travel arrow should be pointing in the direction you need to go.
5. You can look at something in the distance that lines up with your direction arrow, and then head toward this. You could pick a tree or a house, but don’t pick anything like an animal as these are likely to move!
Common map reading mistakes!
Confusing boundary lines, paths and footpaths – People can often misinterpret a boundary line for a path or footpath or vice versa when looking at a map. This can lead to you looking for a footpath that doesn’t exist when out on a walk. Make sure you check the map legend carefully to make sure you interpret the map correctly.
Walking whilst holding your compass – Walking a few paces sideways can throw your compass off course even though you are still walking in the right direction. Also walking whilst holding a compass can distract you from looking out for danger. It’s best to line your compass up with something in the distance and head towards that.
Selecting a moving object to walk towards – It'S best to be walking towards something in the distance that is not likely to move (eg in poor visibility it is easy to mistake a sheep for a rock!).
Not taking magnetic variation into account – Make sure you check for magnetic variation and take it into account when lining up your compass. This will be printed on the map.
Not trusting your compass – If you think your compass is pointing you in the wrong direction, then start again to work out your direction. If it says the same direction again, then trust it – it’s usually right, and your sense of direction wrong.
Related Articles